| ||||||||||||||||||||||||||||||||||||||||||||||||||||||||||||||||||||||||||||||||

#82907 German Munitionsschlepper Pz.Kpfw. IV Ausf. D/E |
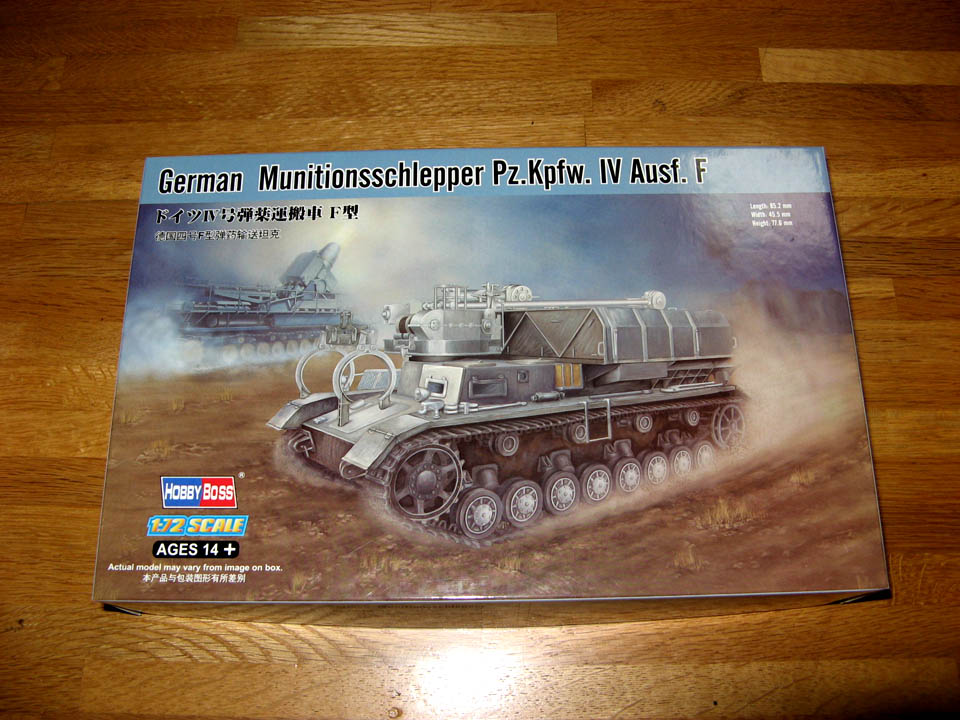
#82908 German Munitionsschlepper Pz.Kpfw. IV Ausf. F |
These kits were announced during Nuernberg Toy Fair in February 2008. Hasegawa's kit has been the only kit of the Munitionschlepper for Karl in this scale. As it is more than 30 years old, and has many accuracy issues, I have waited for these new Hobby Boss kits with much anticipation.
▼Kit Contents▼
The two kits consist of about 130 parts each in the following sprues.
| #82907 Ausf D kit | #82908 Ausf F kit | |
| Chassis, Upper Hull | Common | |
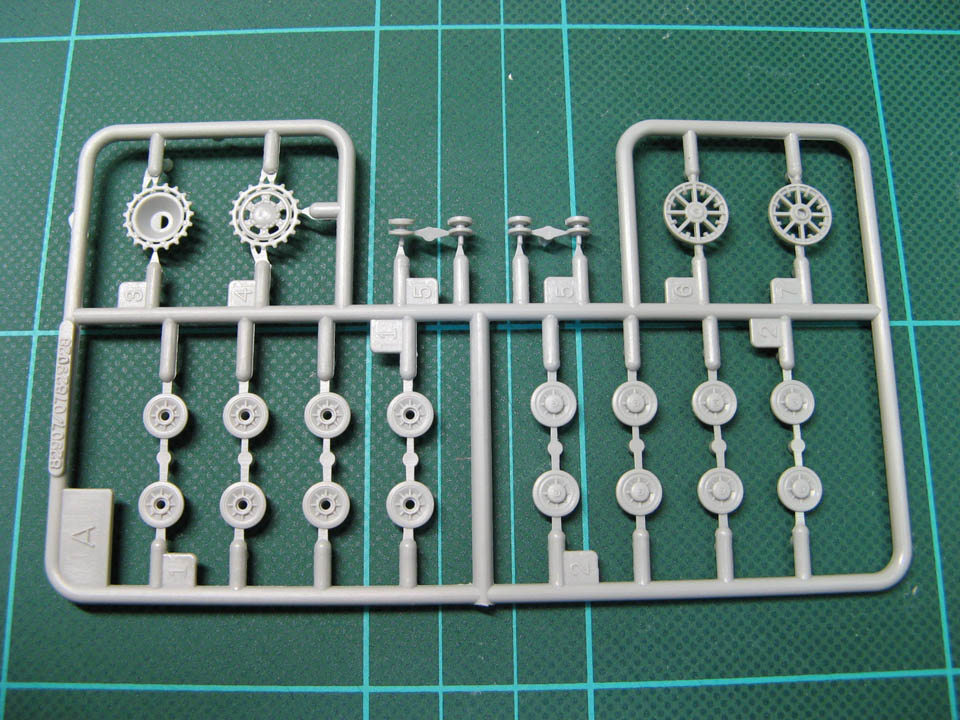
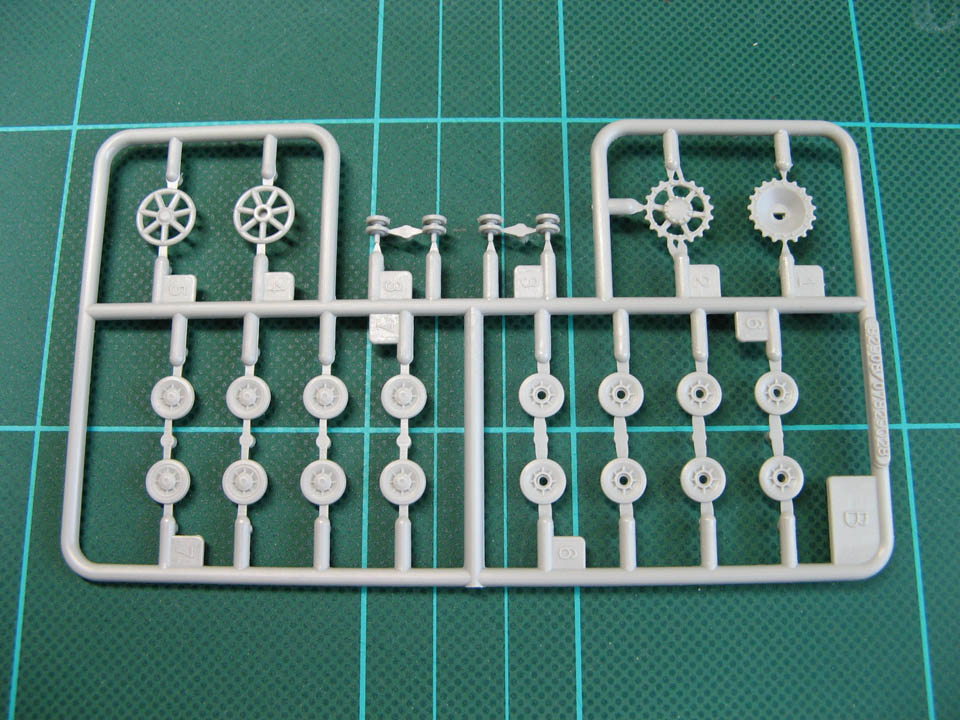
| Wheels | Sprue A | Sprue B |
| Shell Compartment and Crane | Sprues E, F | |
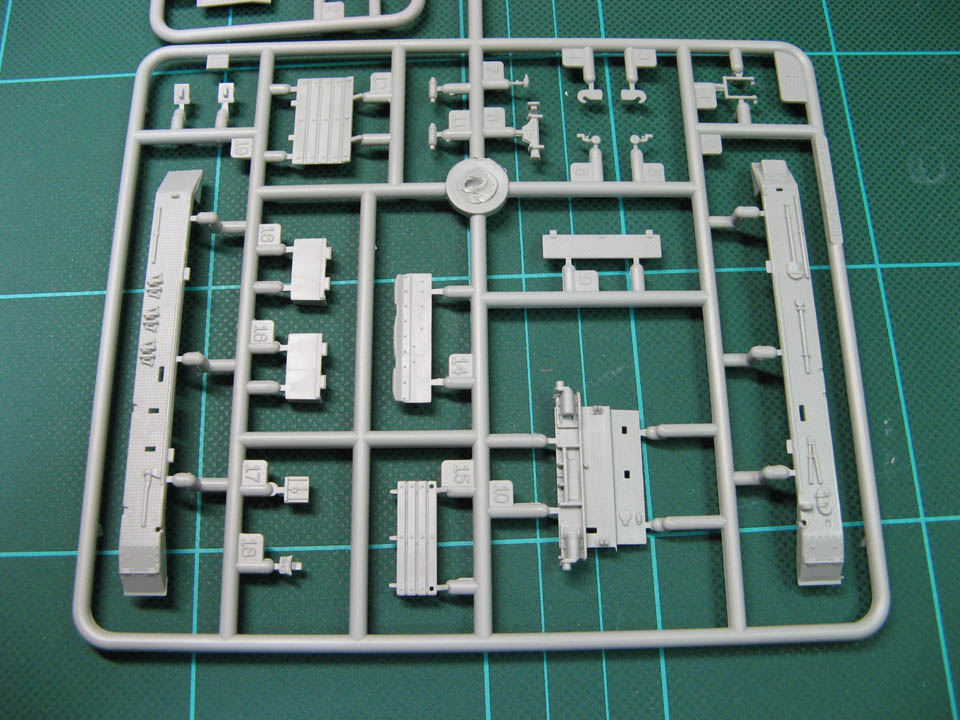
| Details | Sprue C | Sprue D |
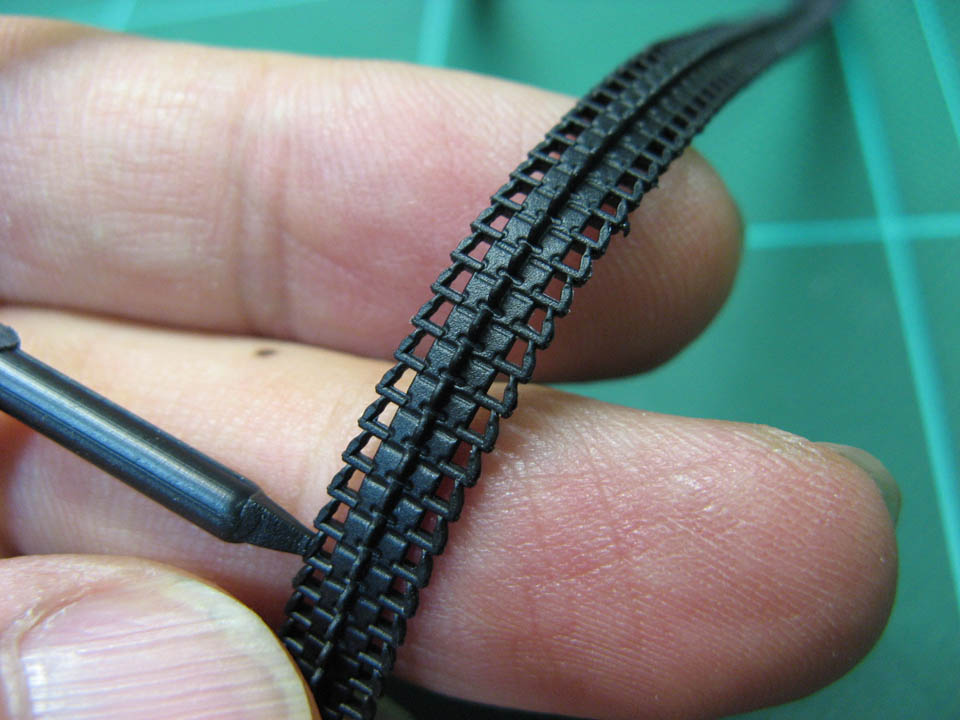
| Tracks | Vinyl (Width 380mm) | Vinyl (Width 400mm) |
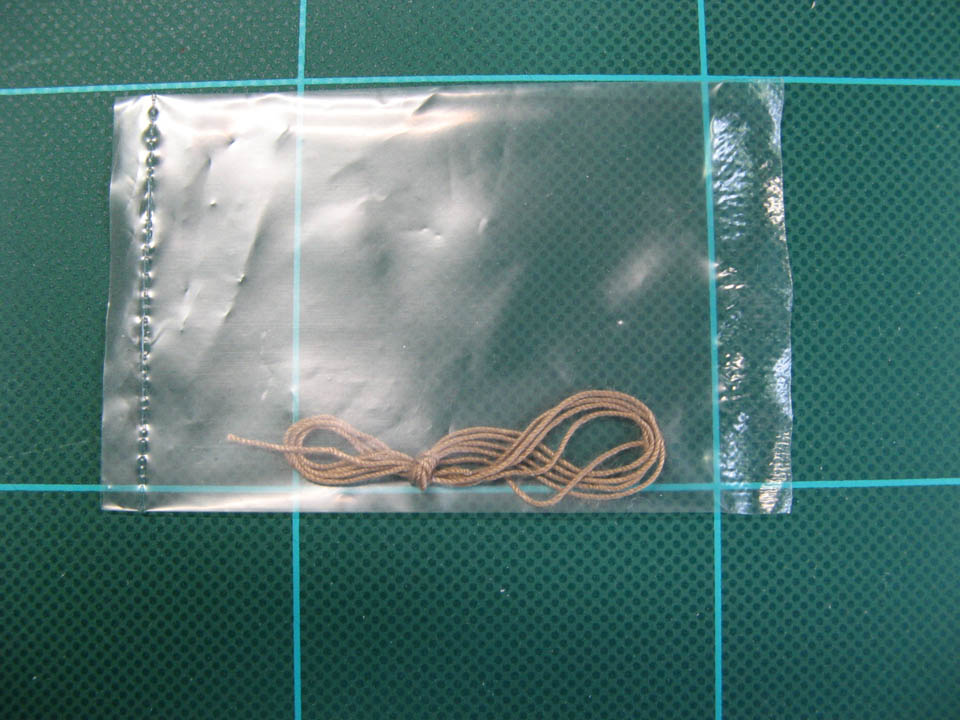
| Other | Thread, 50cm | |
|
|

|

|
| #82907 Sprue A | #82908 Sprue B | #82907 Sprue C | #82908 Sprue D |
|

|
|
|
| #82907/#82908 Sprue E | #82907/#82908 Sprue F | #82907/#82908 Chassis | #82907/#82908 Upper Hull |
| |||
| #82907/#82907 Thread |
As with their 1/72 Karl kits, these kits appear to be based on Trumpeter 1/35 kits. Not that everything is exactly the same, but the basic kit design is the same, with some minor omissions. As Trumpeter's 1/35 Munitionschlepper kits are very sound, Hobby Boss's small scale counterpart looks promising too.
Details are rich, and mold looks good. I wouldn't say these kits are as crisp as recent Dragon or Revel kits. But, they are good enough. There are a few ejector pin marks here and there. Though I didn't find big flash on major parts, some parts have rough surface. You also need to carefully dry fit parts even when there are locating pins (and blocks); some of them do not fit to corresponding holes well.
Some doubt was expressed in internet forums that the kits might come with some parts, such as running gear, originally developed for other Trumpeter 1/72 Pz.IV kits, which were rather mediocre. Fortunately this proved wrong. Chassis, wheels (in sprues A and B), and other plastic bits are newly developed, and have no common element with other 1/72 kits. Vinyl tracks in #82907 represent 380mm width Pz.IV tracks and are also new. Vinyl tracks in #82908 (400mm width type) may originate from another kit, but I cannot confirm that.


|

|
| #82907 38cm Track | #82908 40cm Track |
Vinyl tracks look acceptable.
They are not glueable by regular glues,
but you can use CA glue.
I found them flexible enough,
and it was easy to shape sag by glueing them to the upper wheels with the CA glue.
The box top title of #82907,
"German Munitionsschlepper Pz.Kpfw. IV Ausf. D/E",
seems to suggest that the kit can be built as either ausf D
or ausf E chassis.
But, in reality, the kit can only represent the ausf D chassis.
If you really want a Munitionschlepper on Pz.IV ausf E chassis,
you need to kit-bash #82907 and #82908.
Take idler wheels, tracks, exhaust pipes from #82907,
and sprocket wheels, road wheels, glacis plate (D1) from #82908,
then, you come close to the ausf E chassis,
although you need to tweak these parts a bit to obtain the accurate ausf E chassis.
As exact placement of OVM tools on the real vehicle is not entirely known,
I cannot say if the kits are accurate in this respect.
Please refer to the diagram in the "Munition Panzer IV" page
for my research on OVM placement.
There are couple of apparent errors regarding the OVM placement.
The biggest issue of Hobby Boss Munitionschlepper kits is that
the shell comparment can only be built as completely "shut".
As the real Munitionschlepper has the compartment shut only when it is in transport,
it is very questionable why Hobby Boss chose this configuration.
It is useless, as in the current form, to accompany this Munitionschlepper to Karl.
Note also that some Munitionschleppers had their compartment hatches removed for some reason
in 1942 or later.
The kits also forego with mould lines separating hatches on the roof and the side walls!
I wonder the kit designer in Hobby Boss really understands what this Munitionschlepper is for,
and how it is used...
The photos below show where these lines should be.
If you want to open the hatches,
cut the top and side panels along the lines.
The interior of Munitionschlepper is not known,
thus, we cannot say if Hobby Boss kits are accurate in this respect.
Other Munitionschlepper kit,
such as Trumpeter 1/35 kits,
offer as simplistic shell compartment interior as Hobby Boss's.
I strongly believe that there must have been some hatches to access the engine room
from the shell compartment.
See
the Munition Panzer IV page,
the Trumpeter 1/35 Munitionschlepper page,
and the Hasegawa 1/35 Munitionschlepper page
for possible layouts.
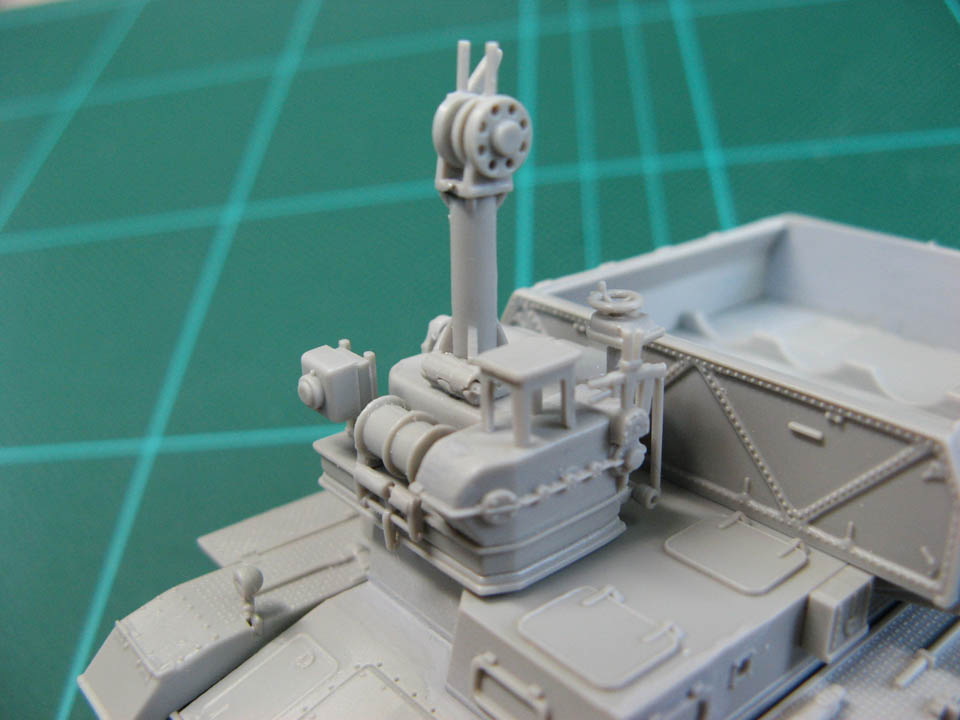
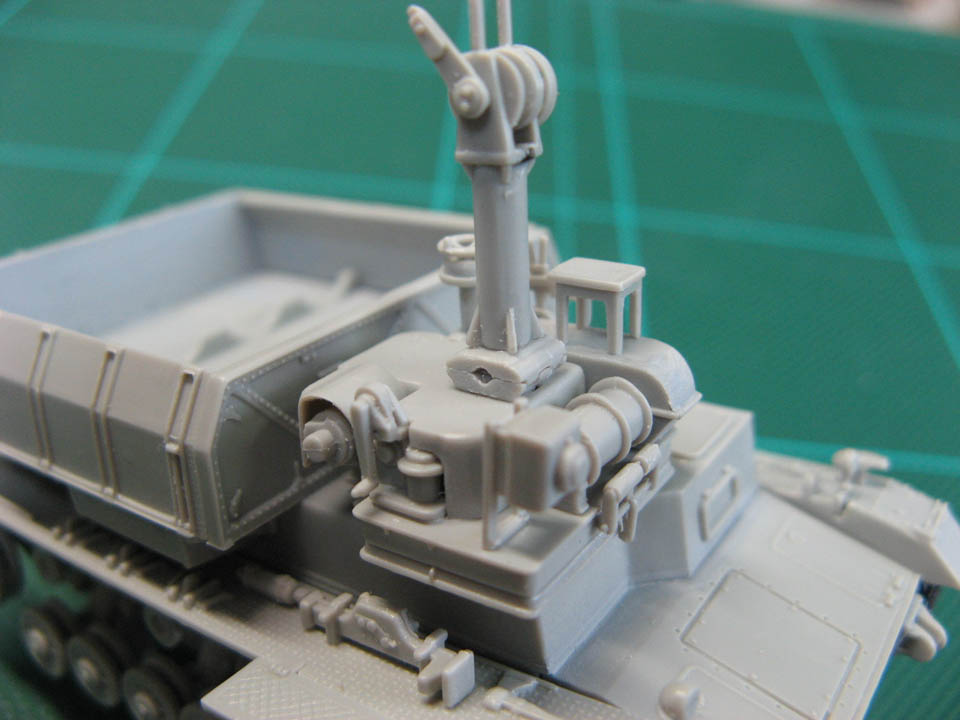
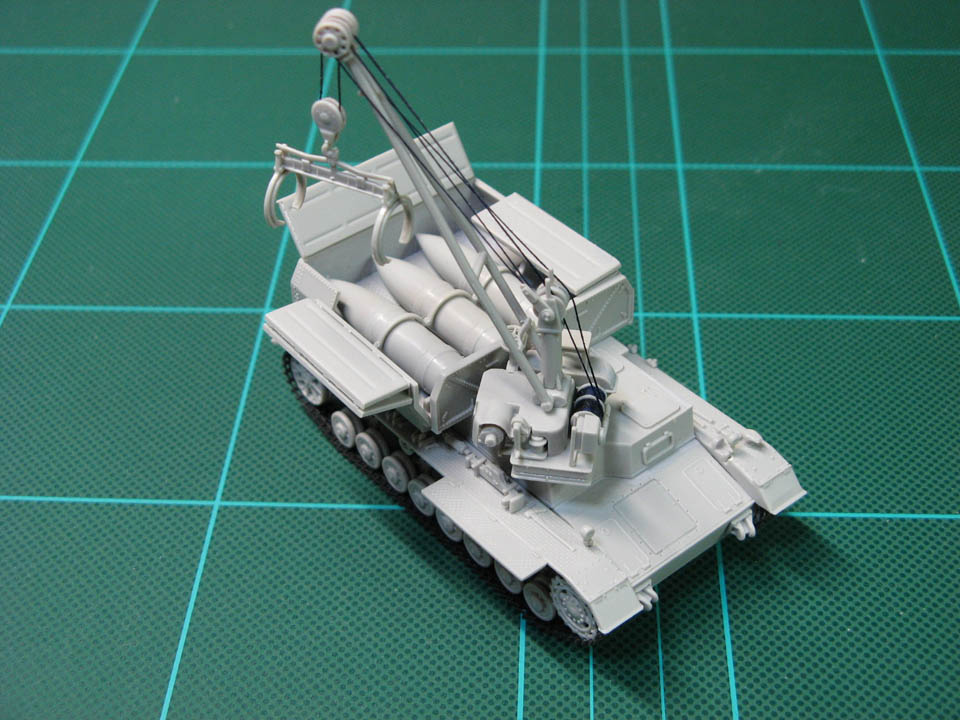
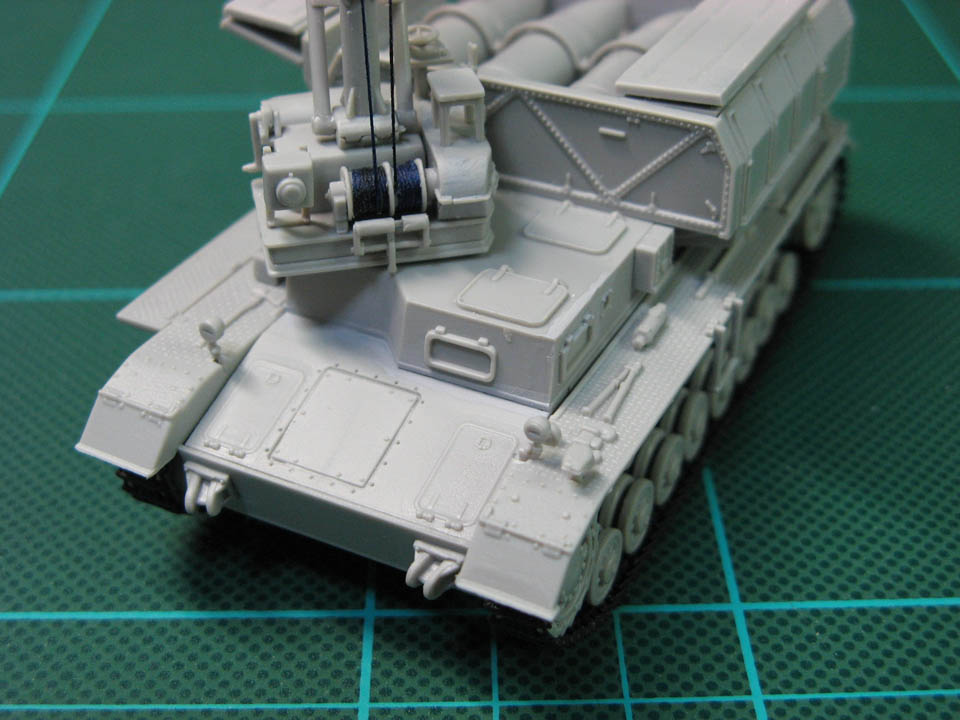
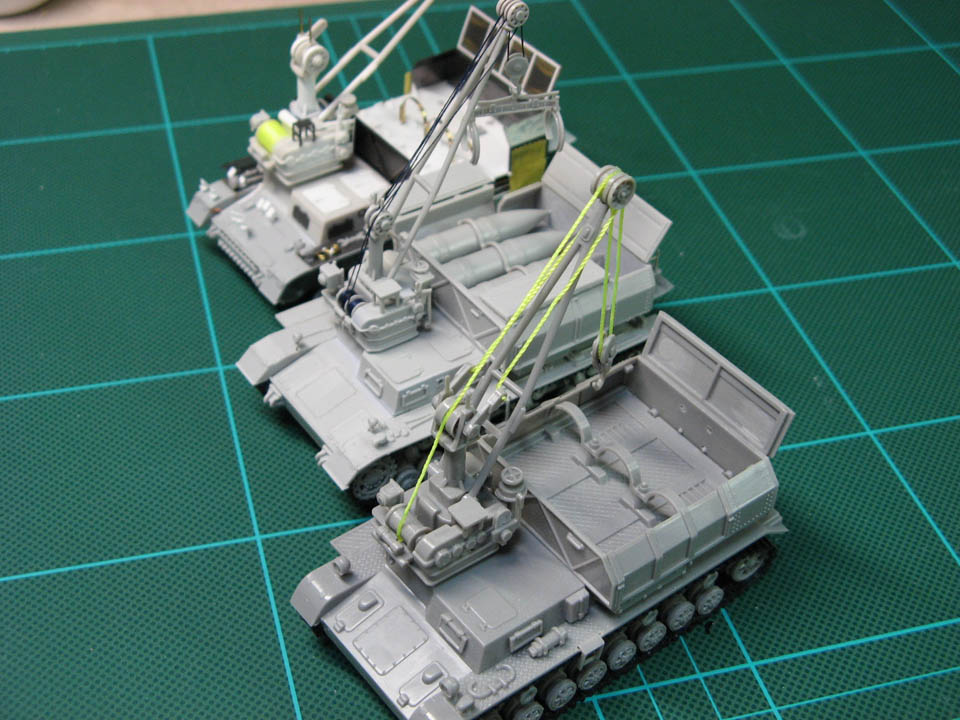
The crane looks very good,
and is far superior to the age old Hasegawa kit.
If you are very picky,
you may want to add some missing bolts.
A string included in the kit as a wire on the crane looks too thick.
You had better find something better.
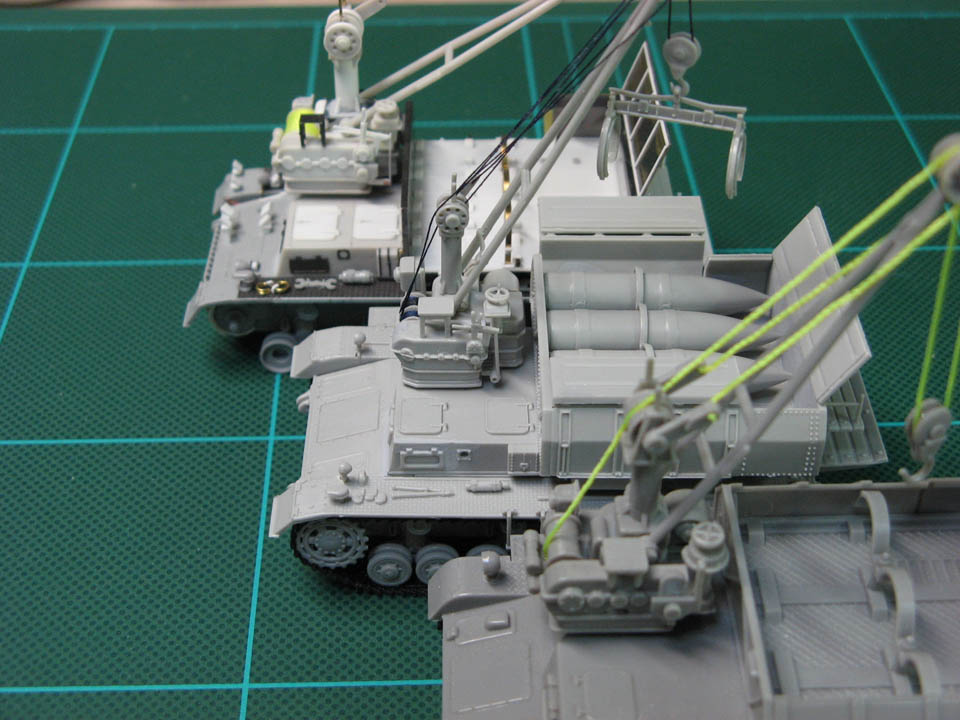
The instruction sheet does not really show how the wire should run around the crane
and the shell gripper.
Refer to
the "Munition Panzer IV" page
for my research result on the crane wire.
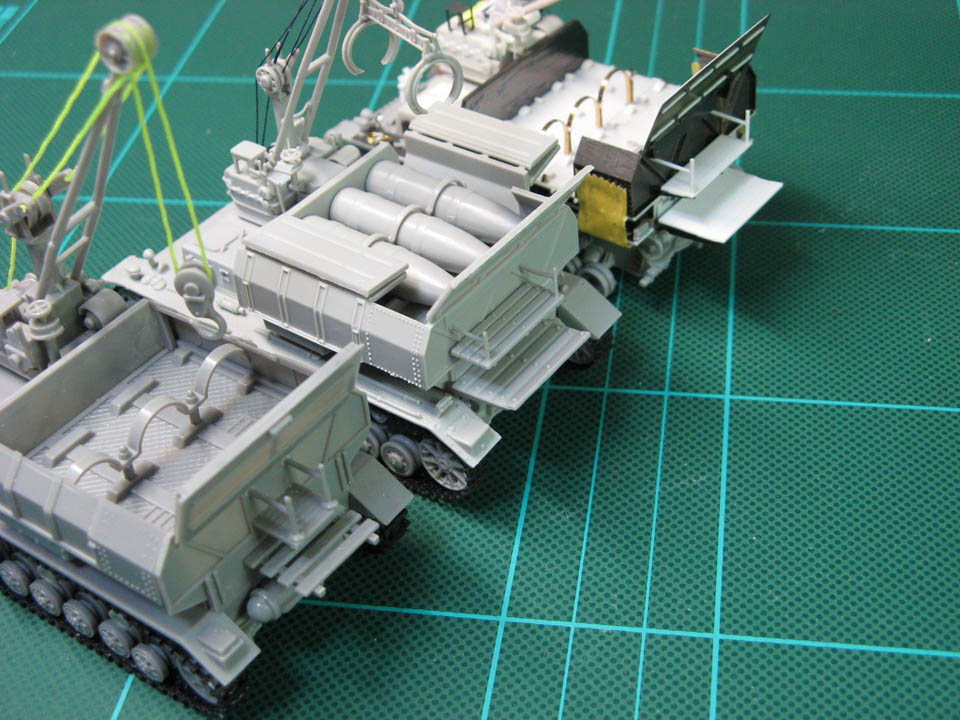
There are at least four types of shells for Karl:
60cm schwere Betongranate,
60cm leichte Betongranate,
54cm leichte Sprenggranate,
and 54cm leichte Betongranate.
Only four 60cm schwere Betongranate are included in the kits.
As Hobby Boss 1/72 Karl kits
can be build either 60cm Geraet 040 or 54cm Geraet 041,
it would have been better if other shell types also included in Munitionschlepper kits.
You will want to drill 8 holes around the bottom of the shell,
as shown in a photo below.
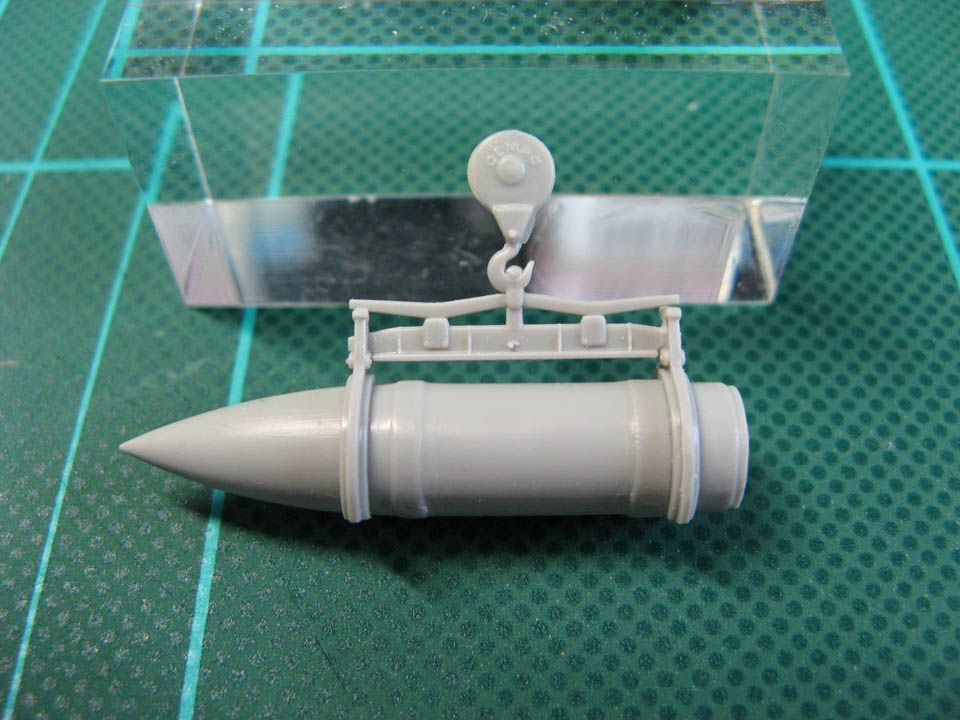
The kits also have only one type of shell gripper: the one for 60cm schwere Betongranate.
The gripper consists of four parts.
You had better use the shell itself as a jig to assemble the gripper,
as shown in a below photo.
The shell gripper was placed on a set of holders on the glacis plate and the RHS fender.
These holders are omitted in the kits.
You may want to scratch build the holders,
using
Trumpeter 1/35 Munitionschlepper kits
and the box art of Hobby Boss kits as reference.
It seems many parts in
Eduard's PE set #22065 PZ.IV Munitionwagen
for Hasegawa kits also can be used on Hobby Boss kits.
In particular,
shell compartment walls and hatches will be most useful
to replace thick kit parts.
(However, Eduard parts may need to be slightly adjusted for the Hobby Boss kits,
as they were originally designed for Hasegawa kits.)
Fender parts in the PE set are also very handy,
when we want to dispense with moulded-on OVM tools.
No decal is provided.
This is unfortunate but understandable,
because Munitionschlepper for Karl did not have many markings.
The only interesting markings found are:
the unit emblem on the front mud guard and the rear of the shell compartment in 1941,
and nick name, or something, on the side of the shell compartment in 1942.
But their details are not quite known,
as there aren't clear photos showing these markings.
I would expect some decal manufacturers might come up with a decal set in the future.
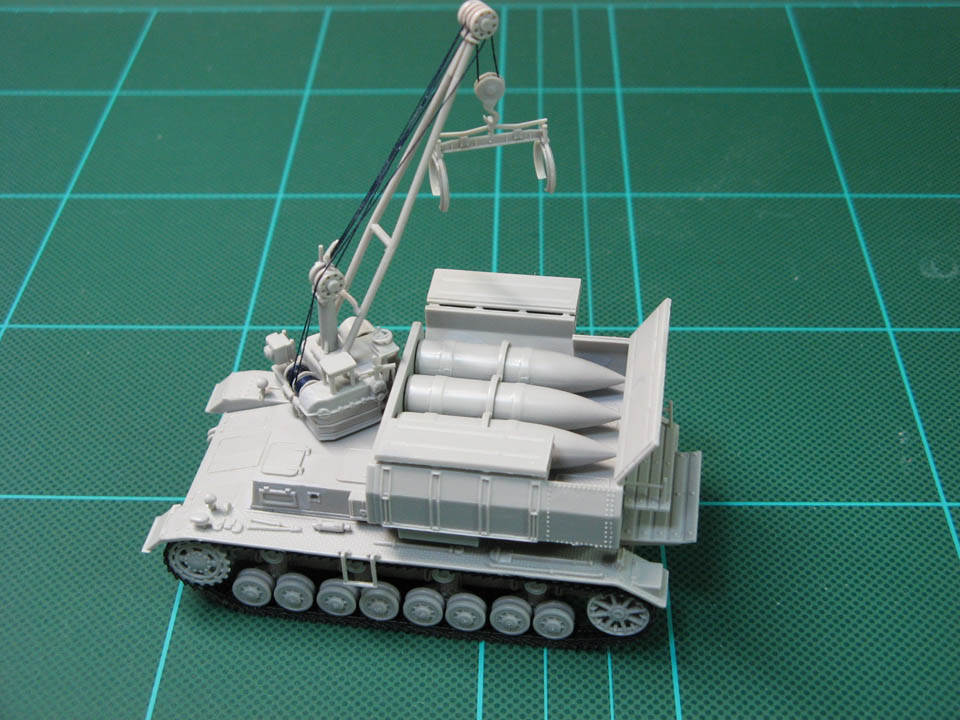
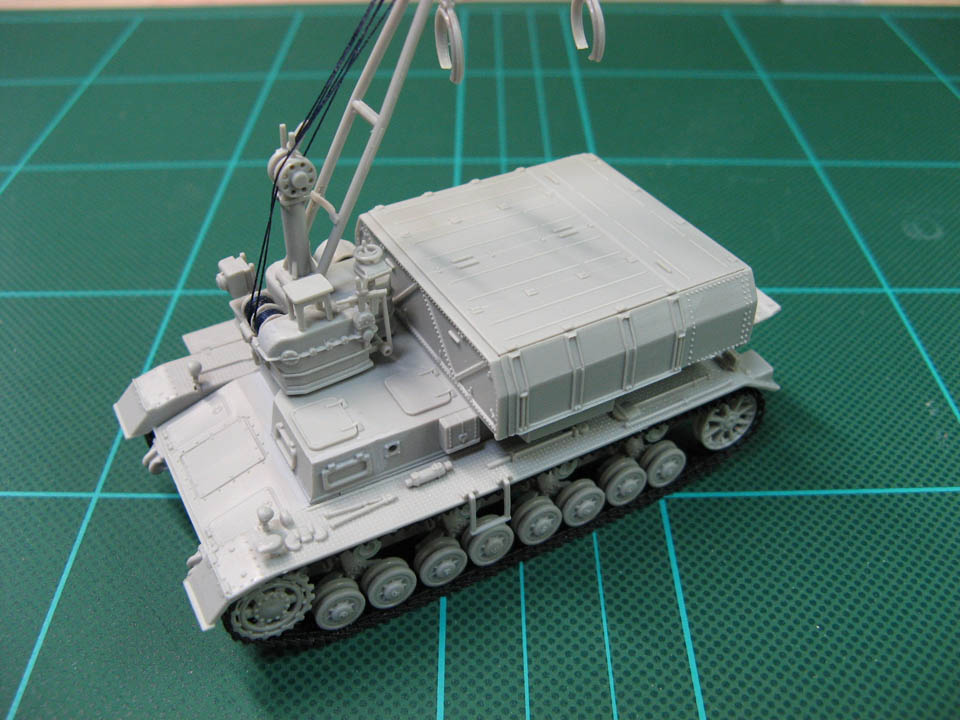
The box art of the two kits both show the vehicle with their shell compartment hatch closed,
and the crane folded for transport.
As mentioned earlier, the kit's shell compartment is reproduced with the hatches closed,
but the instruction sheet shows the crane to be unfolded and standing high
as used during loading a shell to Karl.
This is small discrepancy but is still confusing for those who are not
quite familiar with Karl and its Munitionschlepper.
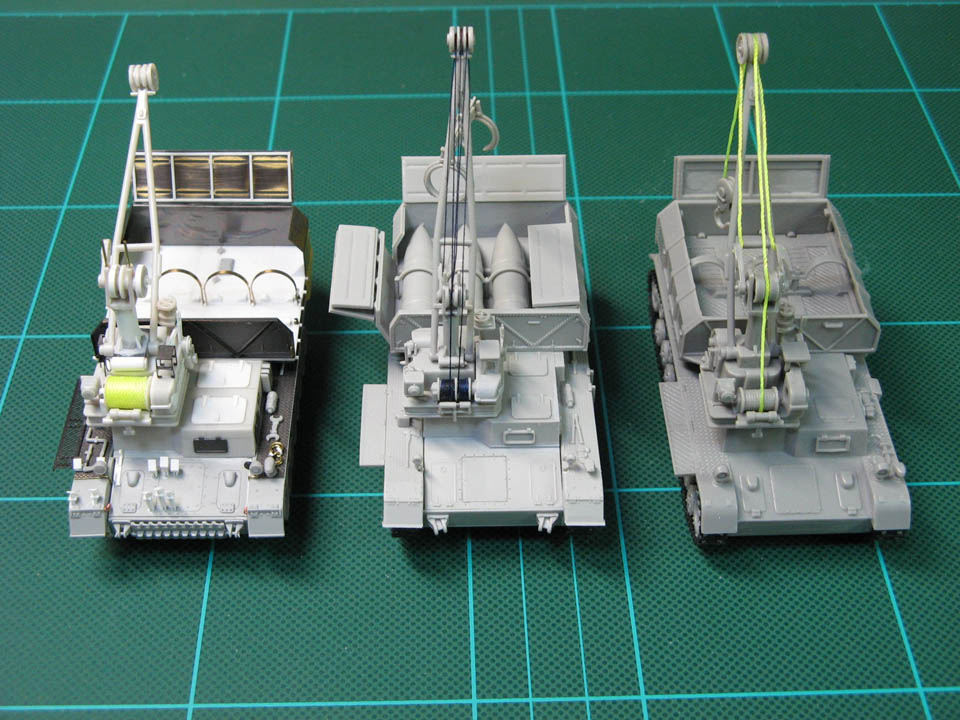
Hobby Boss #82907 "Munitionsschlepper PzKpfw IV Ausf D" (center),
old Hasegawa Mini-Box No.33 "Karl with Munitionspanzer IV" (right),
and a Hasegawa kit substantially updated and detailed
with parts from Revel and Dragon kits,
and an Eduard PE set
Dimensionally Hobby Boss and Hasegawa kits are not much different.
But Hobby Boss kit shows much better details such as the crane.
Unless otherwise stated, the following notes apply to both #82907 and #82908 kits.
All in all, the kits represent Munitionschlepper for Karl very well,
despite questionable configuration of shell compartment hatches,
and moulded-on OVM tools.
They certainly are great improvement over old Hasegawa kits,
and should naturally be called the best 1/72 Munitionschlepper kits.
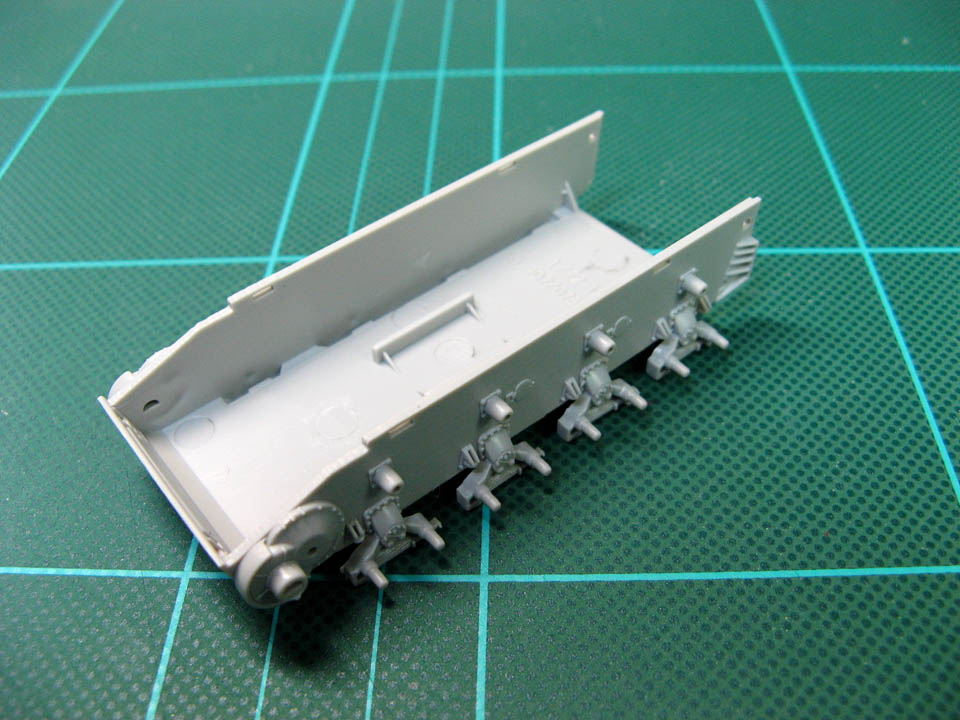
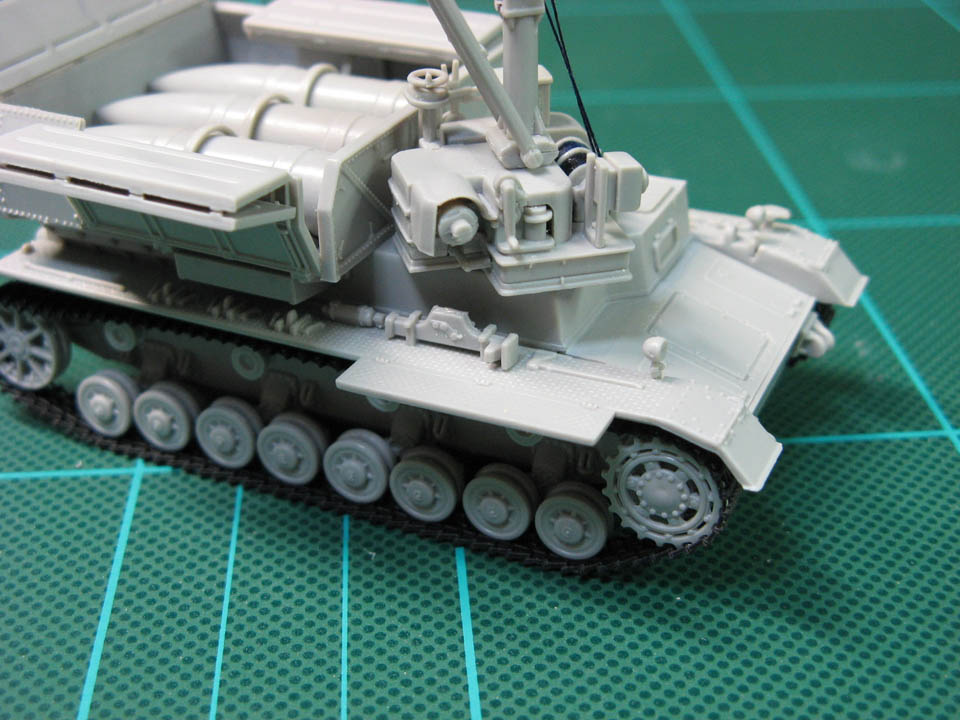
Both the chassis and the upper hull are moulded in one piece each with slide moulds.
With just three more parts, we will get the basic hull construction.
Differences between ausf D chassis (#82907) and ausf F chassis (#82908)
are well represented;
sprocket wheels, road wheels, idler wheels, exhaust pipes,
tracks, and upper glacis plates.
The photos below are of the ausf D chassis (#82907).
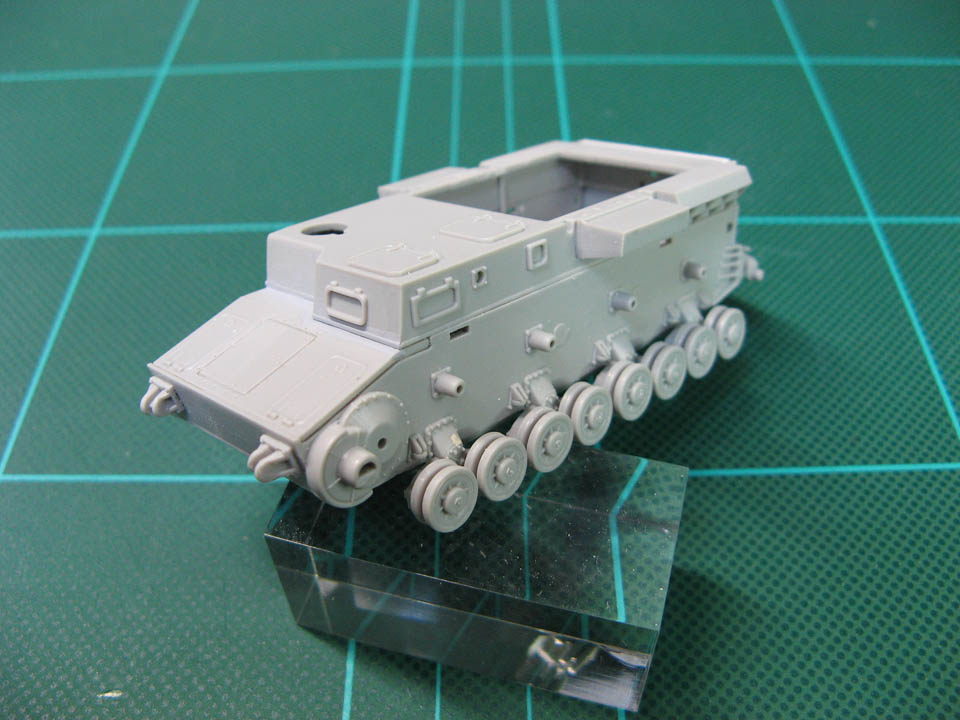
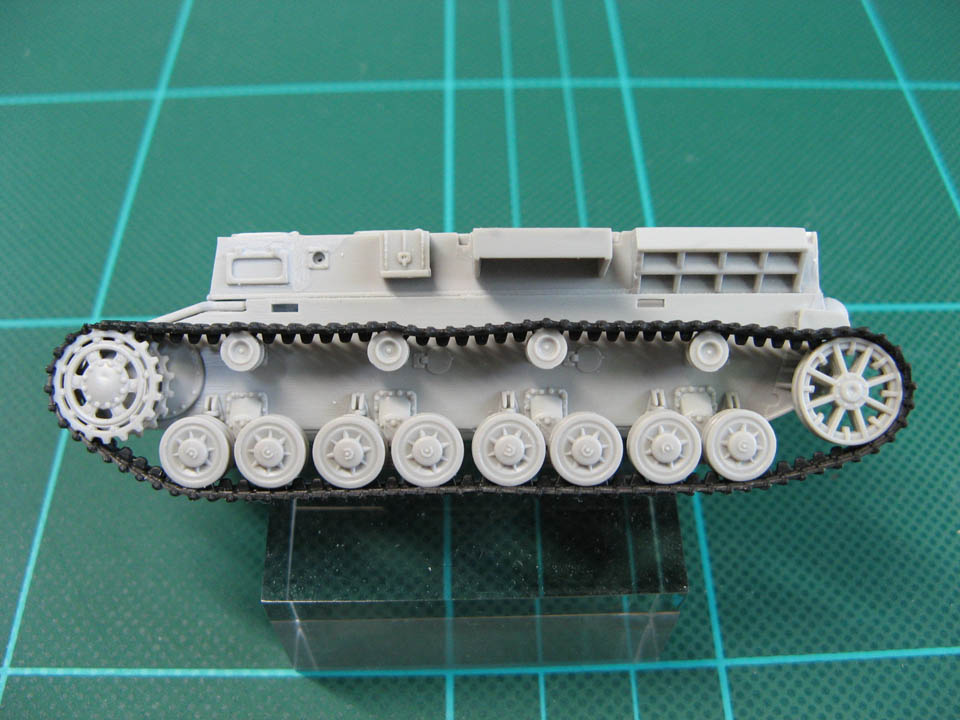

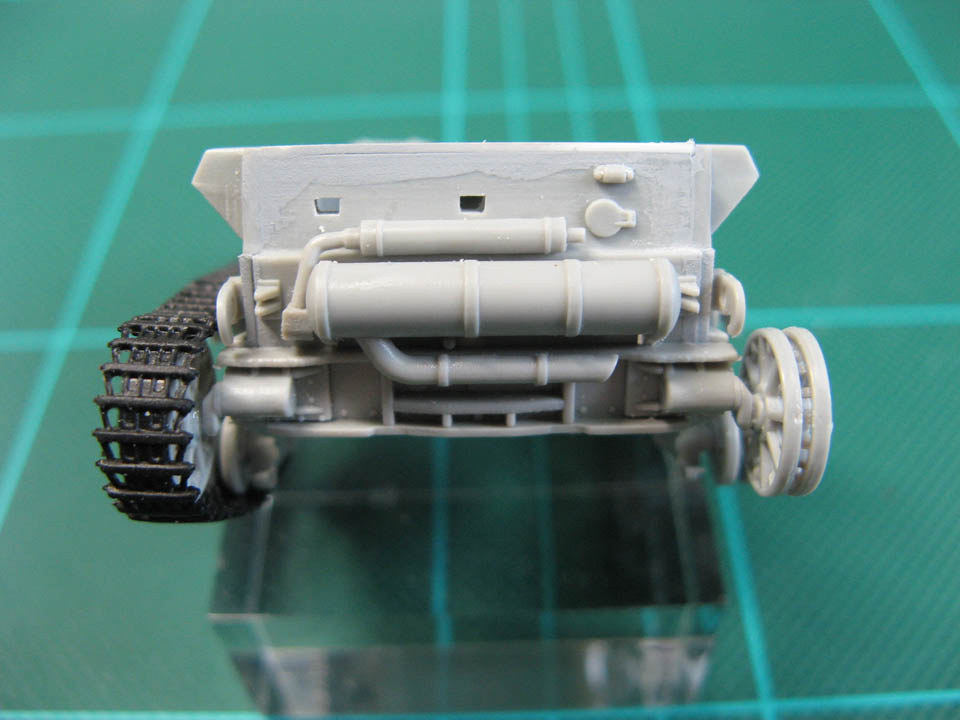
#82907 Pz.IV ausf D chassis
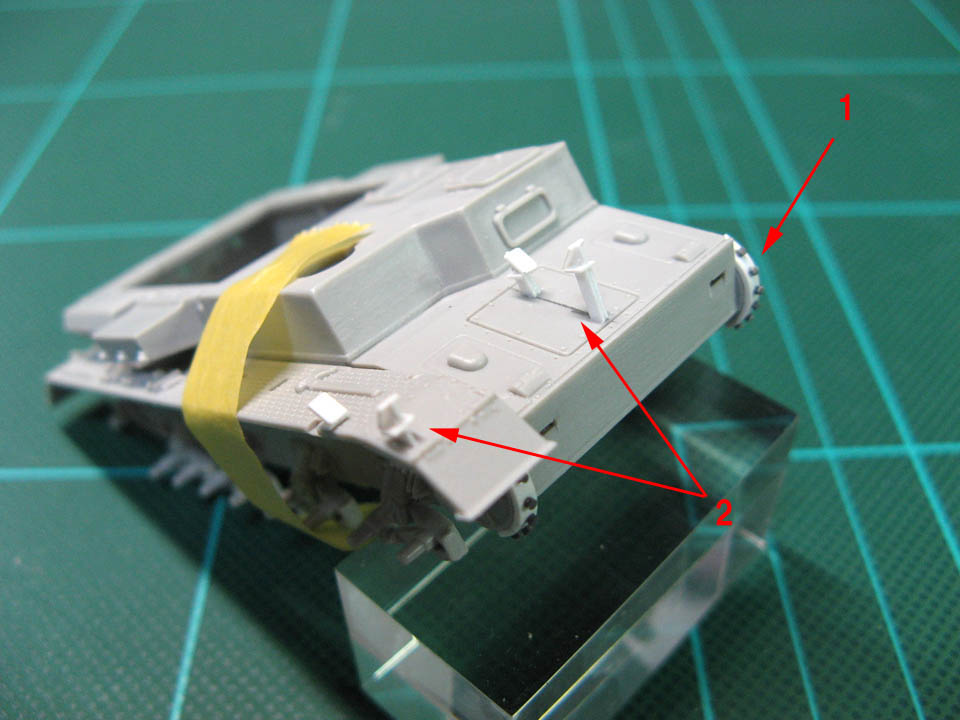
Many OVMs and spare tracks are moulded on fender parts.
Only a pair of fire extinguishers and a jack are supplied as separate parts.
While details of mouled-on OVMs are not so bad,
We would rather expect separate parts for OVMs nowadays, wouldn't we?

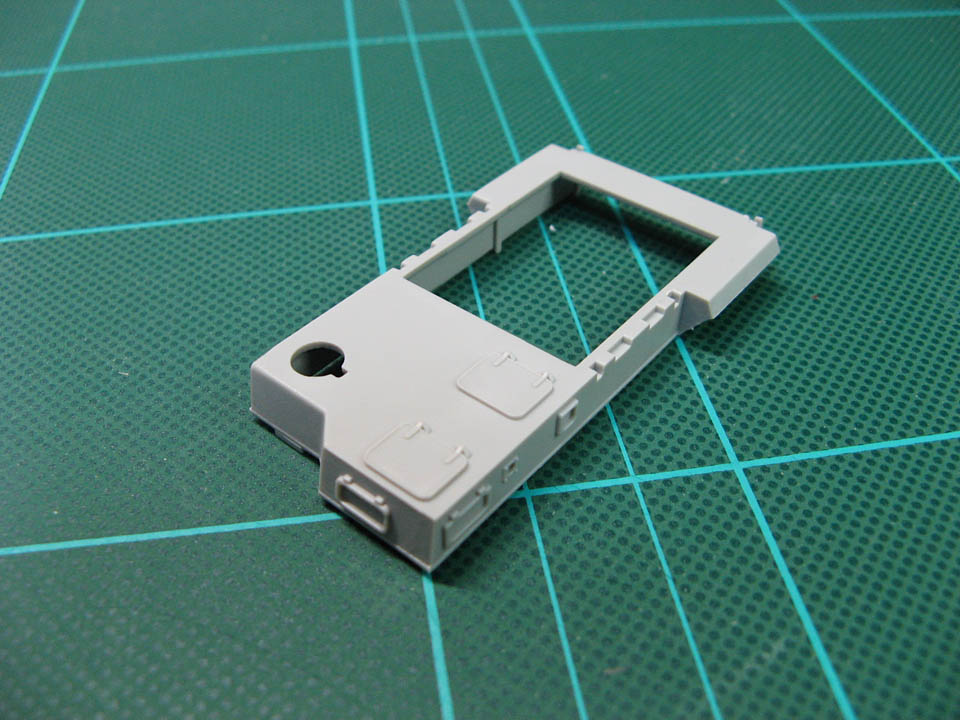
The shell compartment consists of a slide-moulded main body, two side panels,
and the roof panel.
Unfortunately there are a few pin marks and rough surfaces inside the compartment parts.
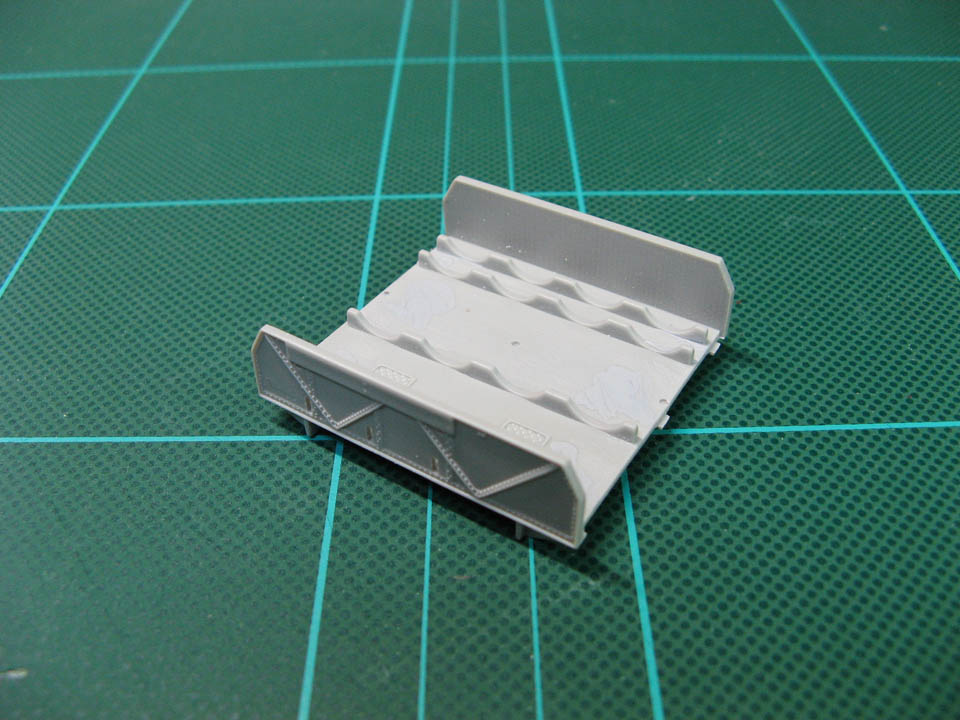
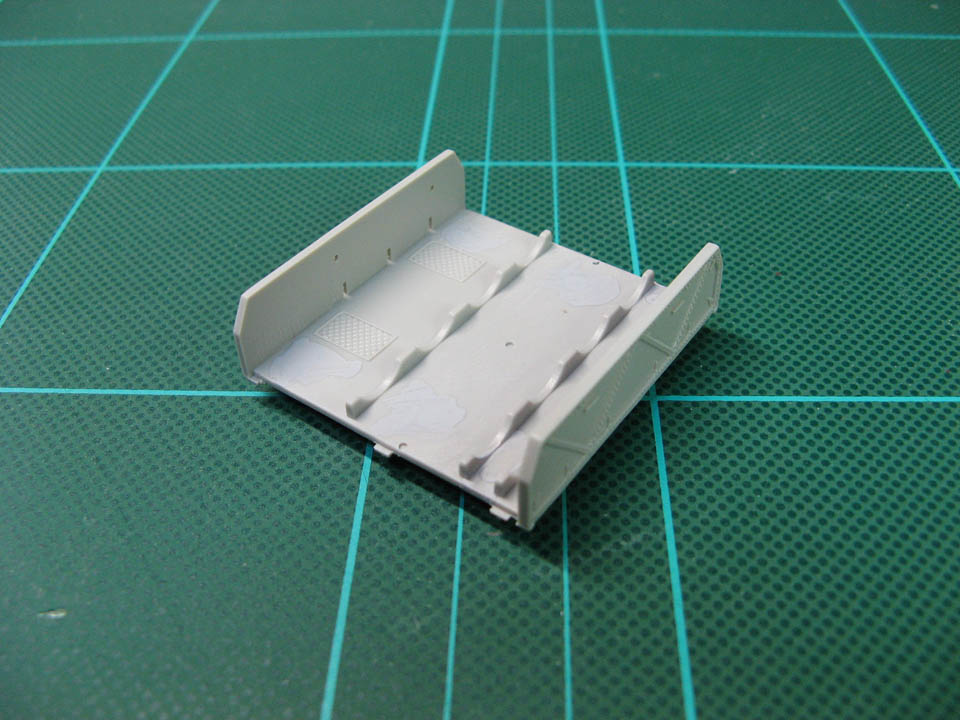
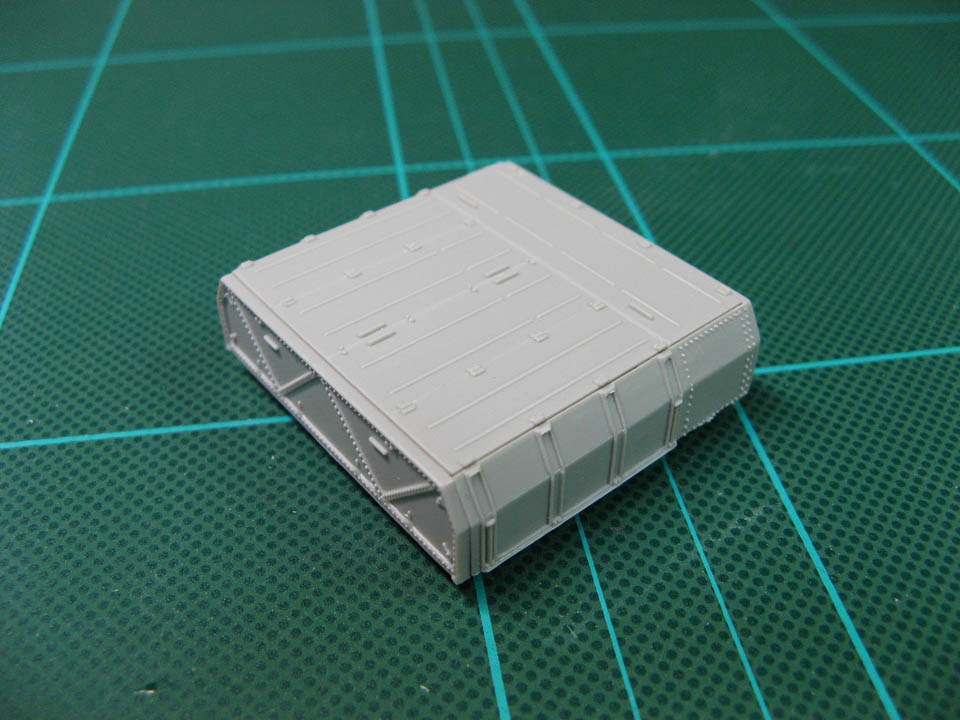
Closed shell compartment
with hatch lines added.
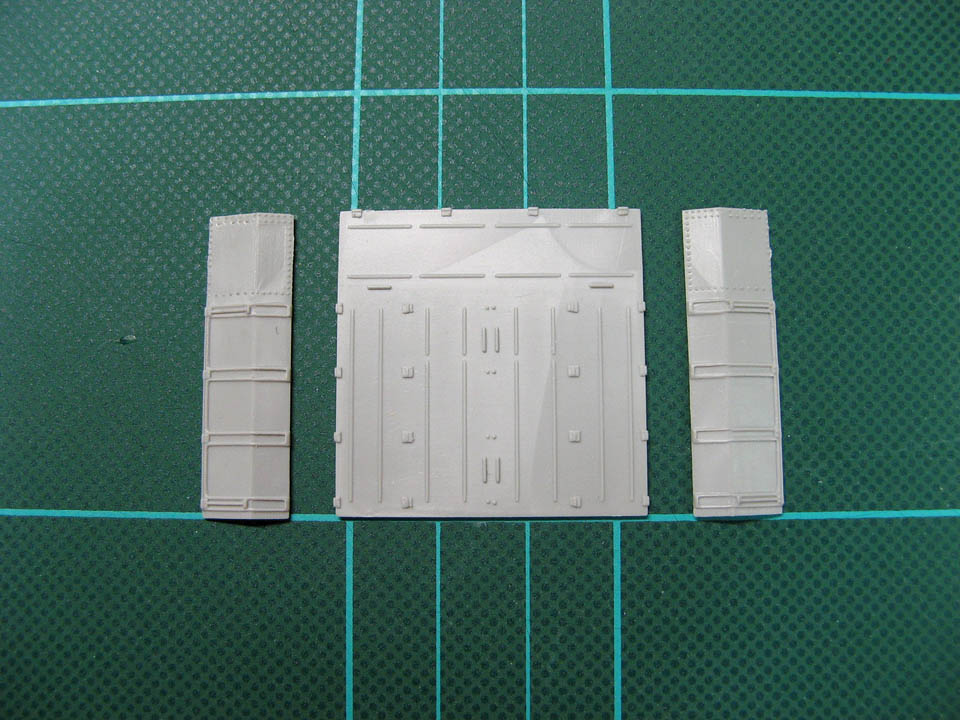
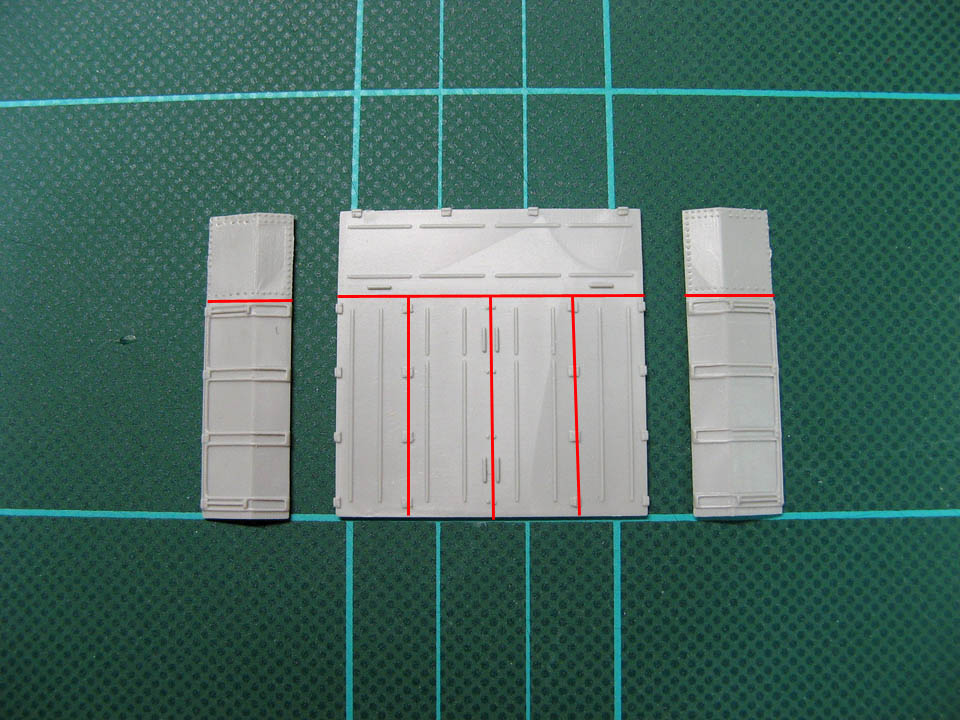
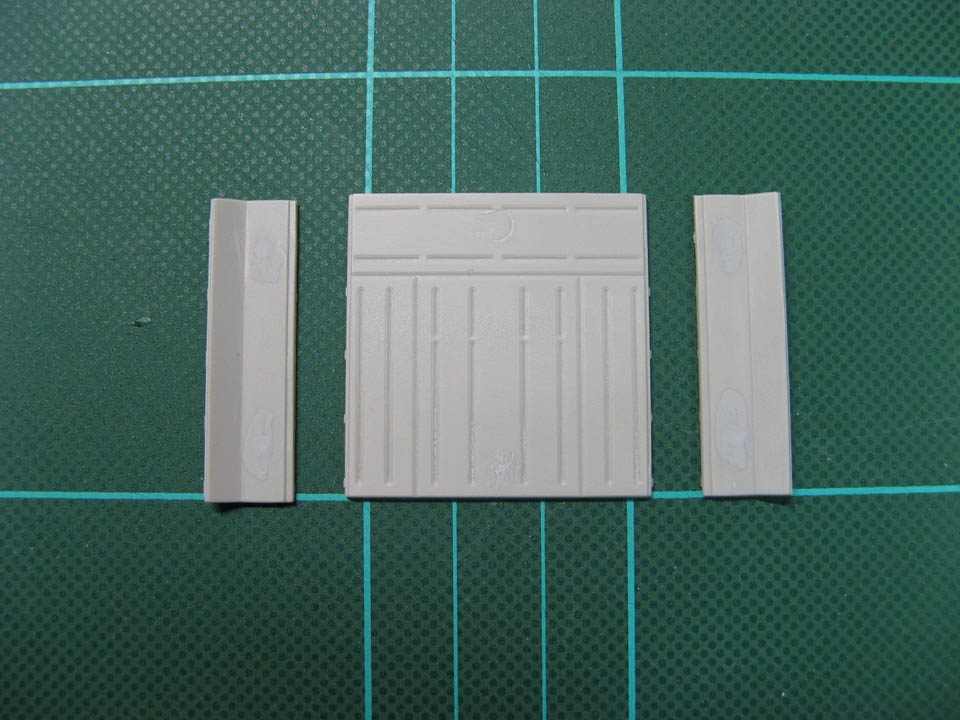
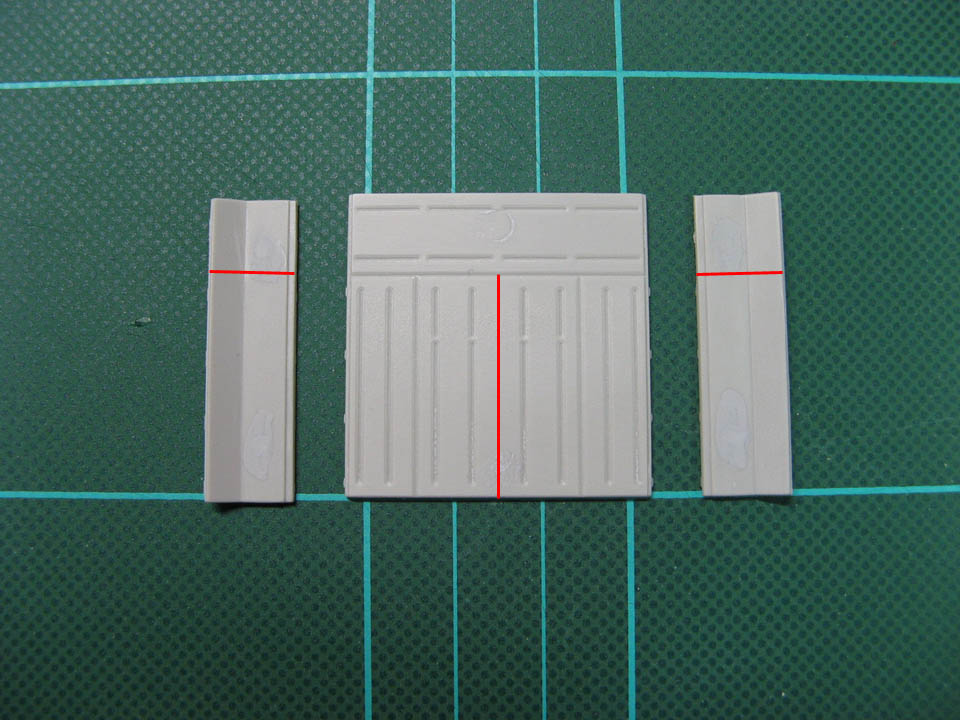
Side and top panels
Side and top panels
(Red lines indicate missing
hatch lines)
Side and top panels,
inner side
Side and top panels,
inner side
(Red lines indicate missing
hatch lines)


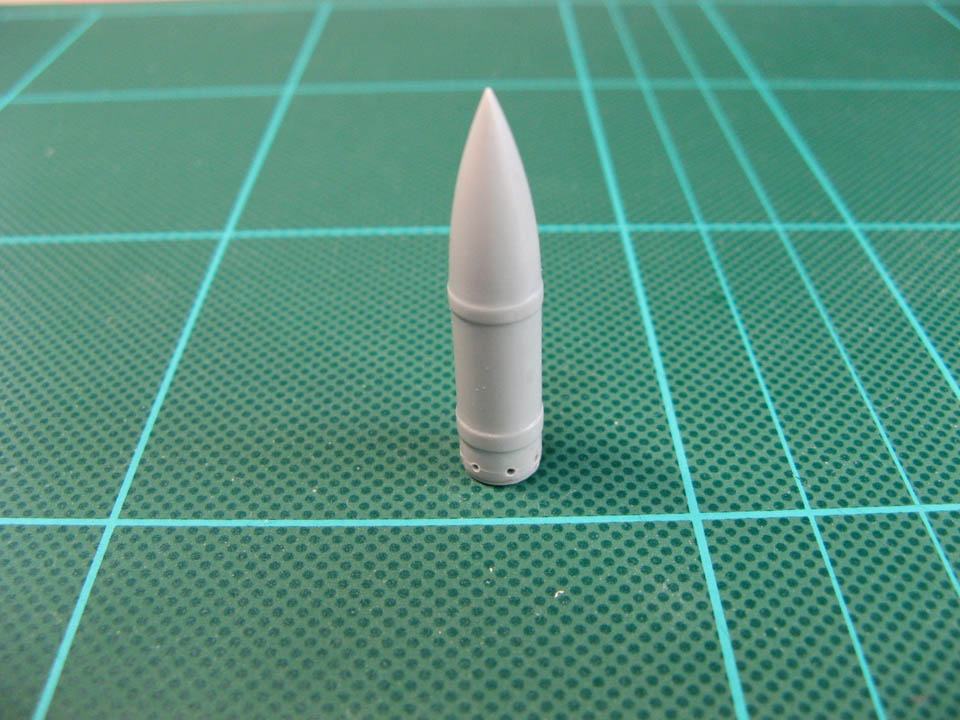
8 holes drilled around
the bottom of the shell


▼Tips for Detail Up▼

▼Comparison with Hasegawa 1/72▼
▼Notes on the Instruction Sheet▼
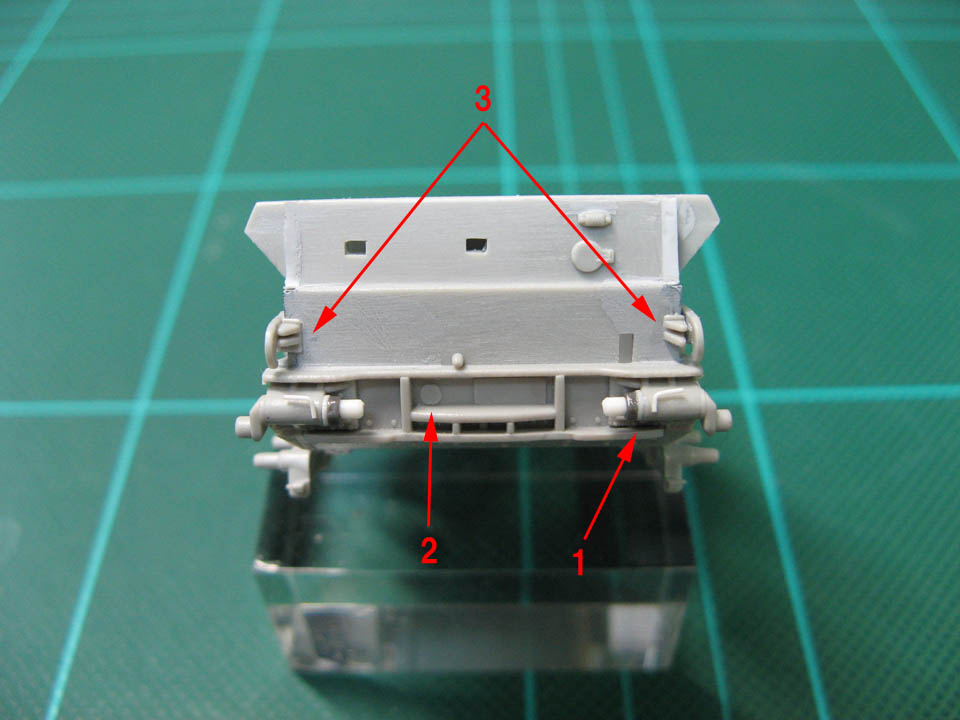
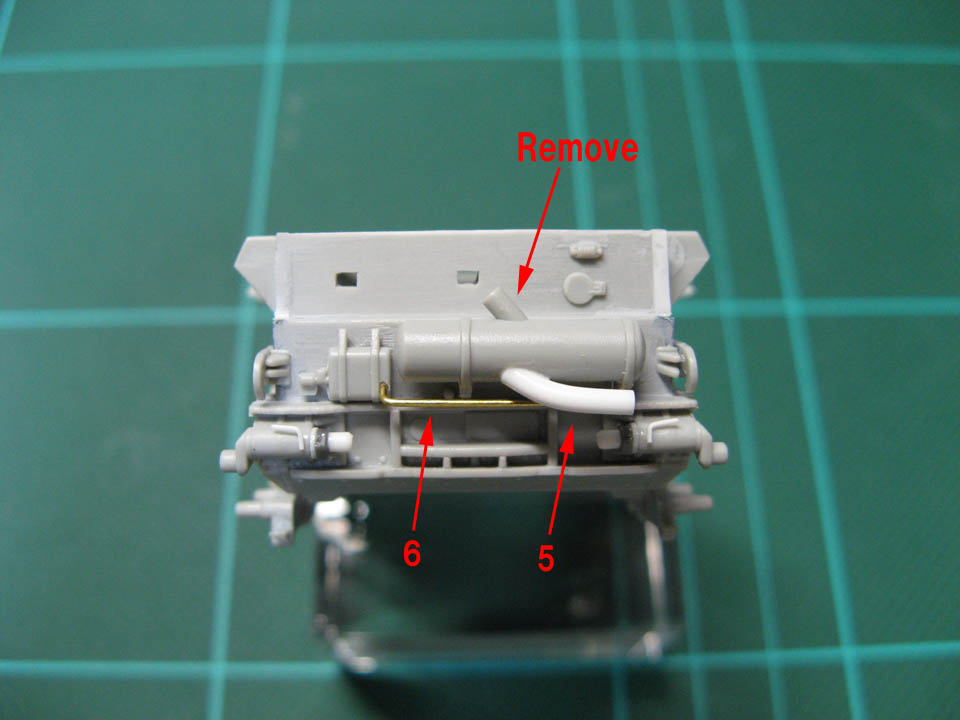
Chassis and the rear panel (E10) need careful dry fitting.
The idler shaft is slightly too short.
You had better find a way to securely attach the idler wheel,
otherwise the shaft might give in
when tension is applied to the idler wheel by a vinyl track.
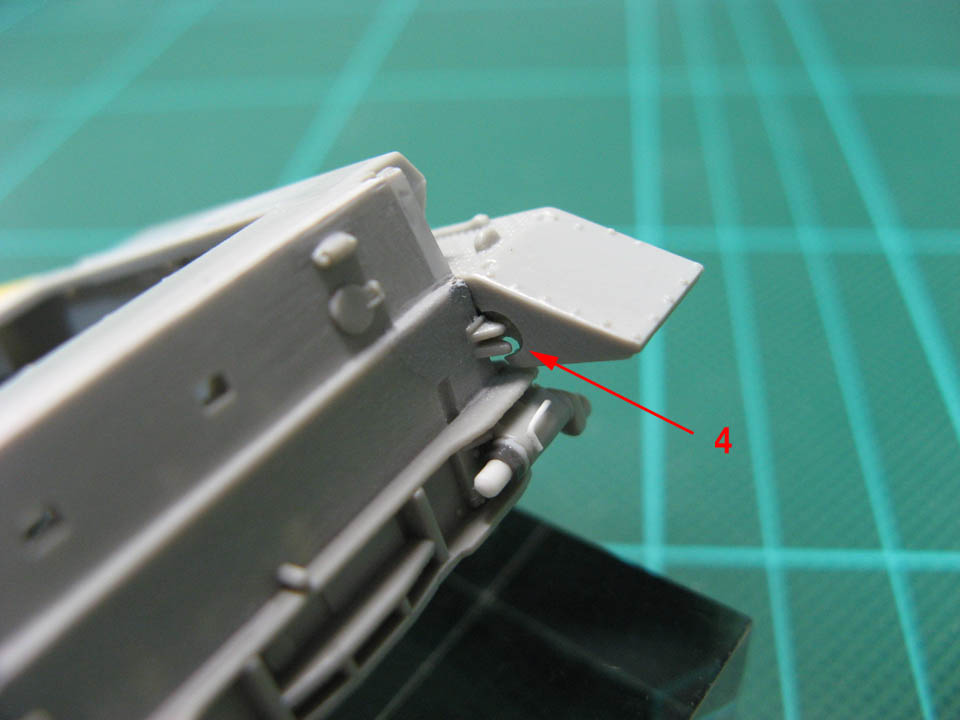
The track tool (F25) should only be attached to the ausf F chassis (#82908),
not to the ausf D chassis (#82907), as opposed to the instructions.
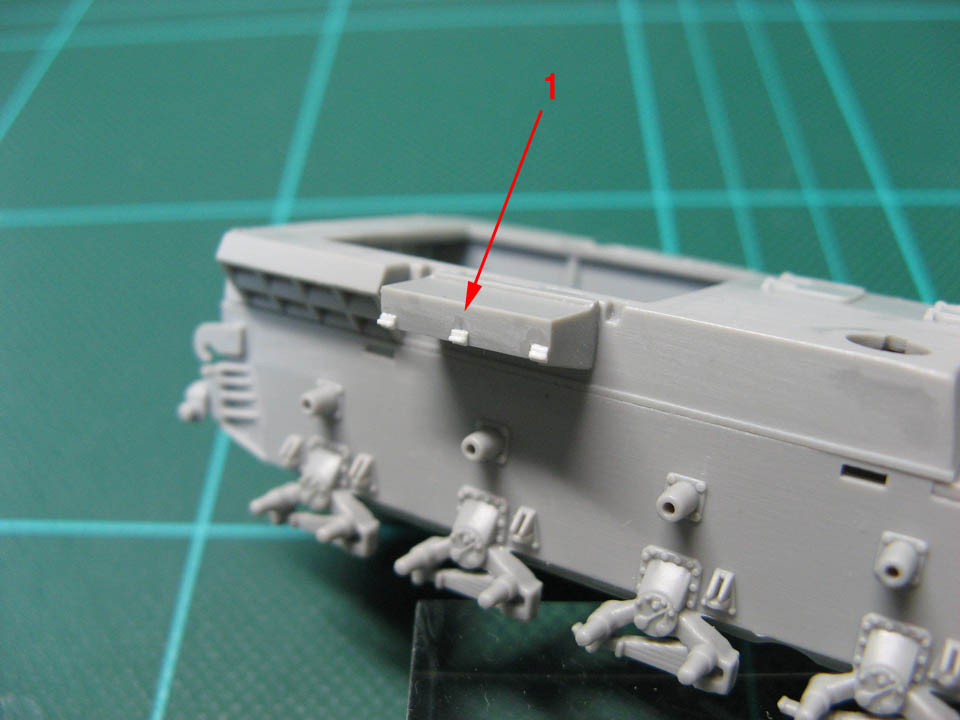
Slightly trim the side of two stowage boxes (E16),
otherwise they will interfare with the shell compartment part (F33).
▼Conclusion▼
Home
![]()
Karl-Geraet, Kits and Information
Copyright 2008 (c) Geraet040, All Rights Reserved.
Created: Saturday July 26, 2008
Last Update: